Build a PayPal Form
Formsite makes building a PayPal form easy. Create a form to collect payments for your event registration, e-commerce store, order form, or donation form. Follow the steps below to see how fast and easy it is to set up your integration with PayPal.
Build Your Form
Before connecting to any payment processor, you will need to build your form.
You need to add Order Form items to your form to collect payments, which tells our system that you may want to collect payments. The items available are:
 Radio Button and Checkbox Pricing Items: List the items available to purchase.
- Radio Button Percent: Allow your customers to select a percent discount or a percent addition. For example, “Get a 10% discount by referring a friend.”
- Text Quantity: Used in conjunction with the pricing items, allows the user to specify how many of the pricing item they want. Place this item in front of either a Radio Button, Checkbox, or Text Field pricing item.
- Text Field Pricing: Allow your users to enter in a specific amount to be charged. Most useful for donations or whenever you want the amount charged to be flexible and controlled by the user.
- Quantity List: Present your customers an option to enter in how many of each item they wish to order from a list of possibilities. This offers flexibility if you expect that users will want multiple quantities of items.
- Coupon Code: Apply either a fixed discount or a percent discount off of the order total if the user correctly types in a discount code.
- Running Total: Provides an order total.
Drag and drop (or double-click) items to add them to your form, then edit the item settings to set the options and prices. For detailed instructions on adding and editing items check out our Form Editor documentation page and video tutorial.
Open Your PayPal Account
Formsite has built-in support for both PayPal and PayPal Pro. If you do not already have a PayPal account, see how the two plans compare.
What’s the difference?
Connect Your PayPal Account
Once your form is created you’re ready to configure the payment processing integration.
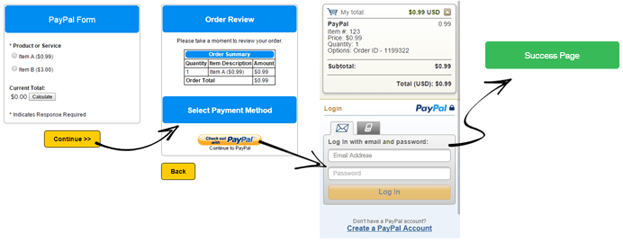
PayPal Standard
- Log in to your account, go to Form -> Payments, and click the PayPal tab.
- Check the box next to Enable PayPal and enter your email address registered with your PayPal account.
- Enter the Item Title and Item Number to help identify payments from your form.
- Optional settings:
- Success and Cancel pages: Create custom pages for successful and canceled transactions or use the default pages provided by Formsite.
- Currency: Choose a currency other than U. S. Dollars.
- Recurring Billing: Set the recurring billing options (see below).
- Additional Parameters: PayPal’s HTML Variables for Payment Transactions.
- Status Email Addresses: Notify via email when the status changes.
- Click Save to finish the integration.
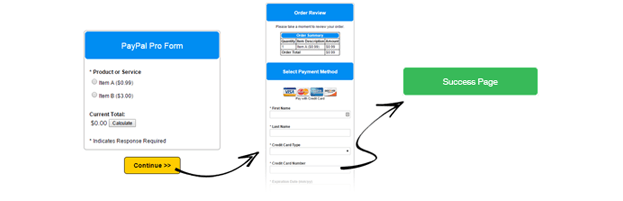
PayPal Pro
- Log in to your account, go to Form -> Payments, and click the PayPal Pro tab.
- Check the box next to Enable PayPal Payments Pro and enter your API Username, Password, and Signature.
- Optional settings:
- Success pages: Create custom pages for successful transactions or use the default page provided by Formsite. Note: There is no Cancel page because the form is completed on Formsite.
- Currency: Choose a currency other than U. S. Dollars.
- Cards Supported: Select supported credit cards. Note: Some cards are available in certain currencies only.
- Recurring Billing: Set the recurring billing options (see below).
- Mapping: If you have fields in your form that can be reused in the payment fields, you can insert them (map) here.
- Additional Parameters: PayPal’s HTML Variables for Payment Transactions.
- Status Email Addresses: Notify via email when the status changes.
- Click Save to finish the integration.
Final Steps
To finish your PayPal form, consider creating custom success pages and email notifications for your customers. Finally, it’s always recommended that you test your form from start to finish to see what your customers will see. Tip: Use the test credit card numbers provided by PayPal to test their payment system.
As always, we welcome questions and comments by contacting Formsite support.