Formatted Text Use and Tips for the Text Editor
Virtually all of the form items and settings use the text editor as a way to enter and format content for your form. This content can be either item questions, labels, or full blocks of text and images. The Formatted Text item lets form owners add content through the text editor in a custom-formatted style, along with links, images, varying fonts, sizes, and colors.
 The text editor is used in several different areas in the form and account including:
- Formatted Text item
- Item labels
- Notification email messages
- Success Pages
- Form header/footer
Formatted Text item
The Formatted Text item is used to add text or images to the form without a form input item, like a radio button or text field. Since it isn’t an input item where form visitors enter an answer, it’s treated differently than other input items:
- Formatted Text items do not appear in the Results Table. Only items that collect answers appear in the results.
- Notifications formatted as Text or Table do not include Formatted Text items, however Simple HTML does. The PDF and Secure Link formats are customizable and may include additional content, but their default use would not include formatting items.
- Pipe codes can be used to insert previously-entered values into Formatted Text items, but text items are not able to be used as sources for piping.
Getting to Know the Text Editor
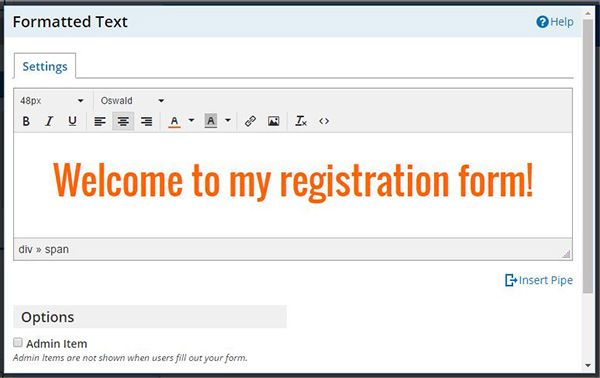
The text editor framework we use is the common editor by TinyMCE, which is a popular text editor used by many online services. The editor has the typical text formatting choices including font, font size, color, weight, alignment, and other text embellishments like underline, italic, strikethrough, etc.
![]()
Aside from formatting, the functions to be familiar with are:
- Links: Add a link by clicking the button that looks like a chain and entering these values:
- Url: Where you want the link to go
- Text to display: The word or phrase to click on
- Title: Descriptive word or phrase that appears when the mouse hovers over the link
- Target: Choose “New window” to open the link in a new browser window or “None” to open in the same window
- Images: Add an image to the text item by clicking the image button and entering:
- Source: The full URL of the image.
- Image description: Displayed if the image doesn’t appear, plus helps with accessibility for visually impaired visitors.
- Dimensions: Optionally set a custom size if the image is larger than needed.
Tips for adding images with the text editor:
- Use an image editor to resize the image instead of using a custom size. Larger images take longer to load and resizing using the browser will always result in a lower quality image.
- Formsite accounts with paid services can use the page at the User menu -> Files & Images to upload their images. Once the image is uploaded, click the icon to see the file’s full URL. Copy and paste into the image’s Source field.
- Other online services are available to host images so a paid Formsite service isn’t required.
- Source code: Add custom scripts and styles to your page by clicking the Source Code button that looks like “<>”. Examples of popular uses include:
- Add conversion tracking code to your Success Page by clicking the Source Code button and pasting the provided code.
- Add custom scripts like Google Translate or other linked libraries to perform custom tasks.
- Add custom HTML instead of using the text editor’s formatting tools.
Styling the Whole Form
While you can use the text editor to set each item’s font, color, etc., the best place to set your entire form’s text attributes is on the form’s Style page. In the Form Editor, find the Style link at the top of the left column then set your form’s:
- Page -> Font Family
- Page -> Font Size
- Form -> Form Text Color
Other text settings for areas like Matrix/Multi-scale and Buttons are also available.